ここ数日で急速に話題が広がっているMastodon。既に1週間ほど出遅れた感じはありますが、オープンソースで誰でも自由にインスタンスを作ることができるってことで、何はともあれ自分のインスタンスを建ててみました。
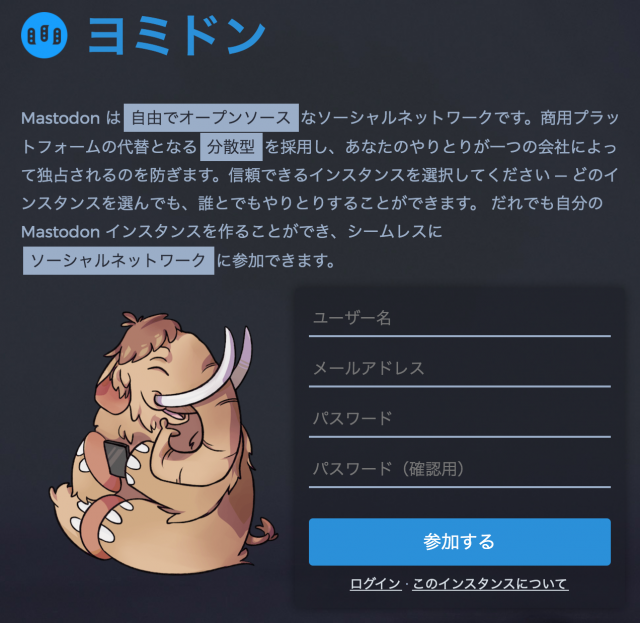
その名も「ヨミドン」!

読谷村には「よみとん」というキャラクターがいます。

それを「Mastodon(マストドン)」とかけてもじってみました。
オープンソースのTwitterクローンとも言われるこのMastodonですが、個人的には遥か昔、パソコン通信時代に熱中していたBBSやRBBS、niftyのフォーラムあたりを彷彿させる部分もあって、今後どんな展開を見せるのか興味津々です。
なんとなく、地域コミュニティのSNSとしても使えるんじゃないかな?って気もするので、とりあえず自分はこのヨミドンインスタンスで読谷村に関する情報をゆるくポストしていってみようかなと思います。
読谷村に興味のある方がいらっしゃいましたら、お気軽に(ゆるめに)ご参加いただけると嬉しい限りです?
なお、以下はインスタンス構築時の手順を自分用にざっとメモったものです。
参考にしたサイトはこちらです。
- Deploying Mastodon on Digital Ocean – Hacker Noon
- How To Secure Nginx with Let’s Encrypt on Ubuntu 16.04
1. インスタンスの取得
今回は、DigitalOceanで環境を構築します。
DigitalOcean: Cloud computing designed for developers
まず、Dropletを取得します。
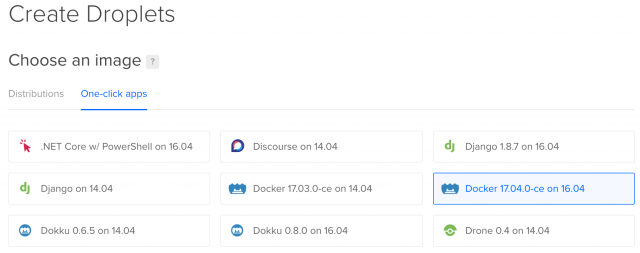
Create Droplets でDropletの仕様を選択していきます。
Choose an imageでは「Docker 17.04.0-ce on 16.05」を選択。
Choose a sizeでは、とりあえず一番安い「$5/mo」を選択。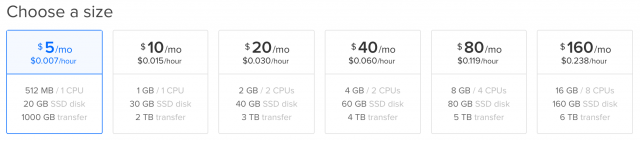
Choose a datacenter regionは、デフォルトで選ばれていた「New York 2」を選択。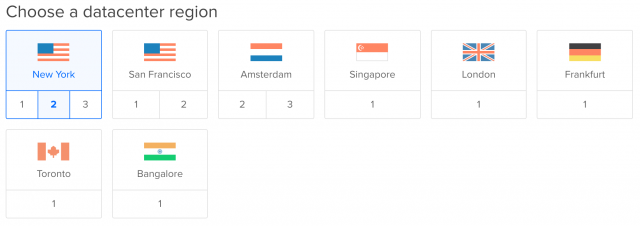
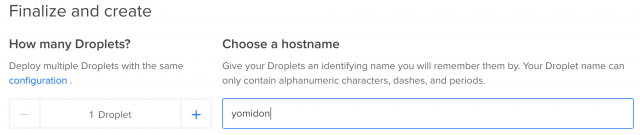
Finalize and createでは、Choose a hostnameに任意のホスト名を指定。
「Create」して数分でDropletの準備ができて、DigitalOceanからメールが届きます。
Droplet Name:
IP Address:
Username:
Password:
インスタンスの管理に必要な情報が記載されているので、大切に保管します。
2. ネットワーク設定
予め取得したドメインを、DigitalOceanのインスタンスに向けます。
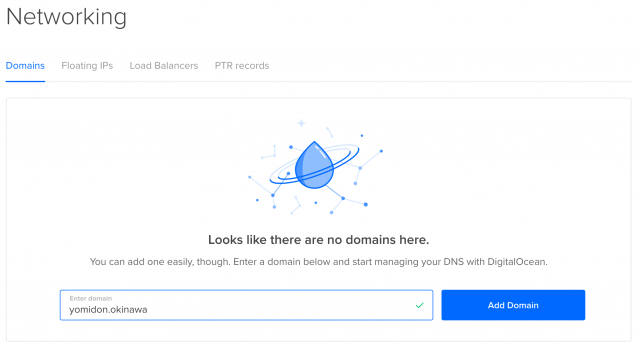
Networking のDomainsで自分のドメインを入力して、「Add Domain」します。
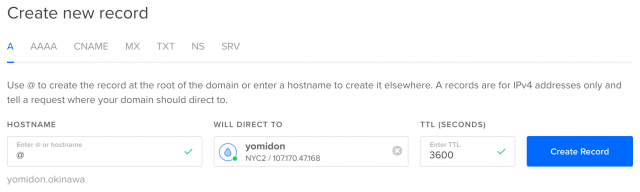
Create new record でAレコードを追加します。HOSTNAMEに「@」、WILL DIRECT TO にDropletを指定して「Create Record」。
DNSレコードにAレコードが追加されました。
3. インスタンスの設定
ここからはインスタンスにSSHして環境を作っていきます。
3.1 SSHしてインスタンスに入る。
$ ssh root@{eメールに書いてあるIPアドレス}
接続時にパスワードの変更を求められるので、それぞれ入力して設定します。
3.2 ユーザーを作成します。
$ adduser yomiton
$ gpasswd -a yomiton sudo
一旦ログアウトして、作成したユーザーでログインしてみます。
$ exit
$ ssh yomiton@yomidon.okinawa
3.3 サーバーのソフトを更新して、nginxをインストール。
$ sudo apt-get update && sudo apt-get upgrade
$ sudo apt-get install nginx
3.4 docker をsudo無しで実行できるようにしておく。
$ sudo usermod -aG docker yomiton
$ sudo service docker restart
4. Mastodonのクローンと設定
4.1 Mastodonをクローンします。
$ git clone https://github.com/tootsuite/mastodon.git
$ cd mastodon
4.2 .env.production に、Mastodonの設定をしていきます。
$ cp .env.production.sample .env.production
$ vim .env.production
4.2.1 DB設定。
# REDIS_DB=0
DB_HOST=db
DB_USER={DBのユーザー名}
DB_NAME={DBの名前}
DB_PASS={DBのパスワード}
DB_PORT=5432
4.2.2 ドメイン設定。
# Federation
LOCAL_DOMAIN=yomidon.okinawa
LOCAL_HTTPS=true
4.2.3 メール送信には SendGridを使いました。
Marketing & Transactional Email Service | SendGrid
SendGridでAPI KEYを取得して、それも.env.productionに記載します。
SMTP_SERVER=smtp.sendgrid.net
SMTP_PORT=587
SMTP_LOGIN=apikey
SMTP_PASSWORD={API KEY}
SMTP_FROM_ADDRESS=yomidon@ogaworks.com
4.2.4 secrets を設定します。
以下のコマンドで secret を生成します(3回)。
$ docker-compose run --rm web rake secret
生成したsecretをそれぞれ3ヶ所に設定します。
# Application secrets
# Generate each with the `rake secret` task (`docker-compose run --rm web rake secret` if you use docker compose)
PAPERCLIP_SECRET=
SECRET_KEY_BASE=
OTP_SECRET=
4.3 インスタンスの情報(名前とか概要など)を必要に応じて設定します。
$ vim ./config/settings.yml
4.4 サーバーにスワップを設定しておきます。
$ sudo fallocate -l 1G /swapfile
$ sudo chmod 600 /swapfile
$ sudo mkswap /swapfile
$ sudo swapon /swapfile
4.5 コンテナを落としてもデータが消えないように設定します。
4.5.1 docker-compose.yml の設定
$ vim docker-compose.yml
dbとredisのvolumesをアンコメントして有効化します。
db:
restart: always
image: postgres:alpine
volumes:
- ./postgres:/var/lib/postgresql/data

redis:
restart: always
image: redis:alpine
volumes:
- ./redis:/data
4.5.2 postgresディレクトリ作成
$ mkdir postgres
4.5.3 redisディレクトリ作成
$ mkdir redis
4.6 コンテナのビルド
$ docker-compose build
4.7 コンテナの起動
$ docker-compose up -d
4.8 DBの作成と確認
$ docker exec -i -t mastodon_db_1 /bin/bash
bash-4.3# su - postgres
~$ createuser -P {DBのユーザー名}
~$ createdb {DBの名前} -O {DBのユーザー名}
$ psql -l
4.9 dbのmigrate
$ docker-compose run --rm web rails db:migrate
4.10 assetsのprecompile
$ docker-compose run --rm web rails assets:precompile
4.11 コンテナとnginxの再起動
$ docker stop $(docker ps -a -q) && docker-compose up -d
$ sudo systemctl restart nginx
5. letsencryptを使ったSSLの設定
ここは How To Secure Nginx with Let’s Encrypt on Ubuntu 16.04 | DigitalOcean の手順通りだけど一応メモしておきます。
5.1 Let’s Encrypt Client をインストールして、nginxを設定します。
$ sudo apt-get update
$ sudo apt-get install letsencrypt
$ sudo vim /etc/nginx/sites-available/default
server {
:
 # root /var/www/html;
 root /home/yomiton/mastodon/public;
:
 location ~ /.well-known {
 allow all;
 }
5.2 Firewallの設定
$ sudo ufw allow 'Nginx Full'
$ sudo ufw status
5.3 nginxの再起動
$ sudo nginx -t
$ sudo systemctl restart nginx
5.4 SSL certificateをリクエストします。
$ sudo letsencrypt certonly -a webroot --webroot-path=/home/yomiton/mastodon/public -d yomidon.okinawa
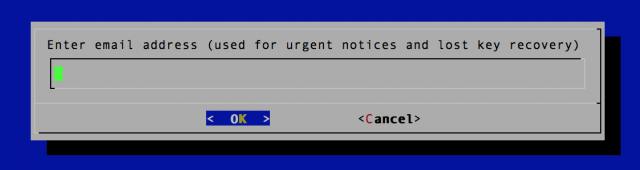
すると、こんな画面が出るので、連絡先のメアドを入れる。
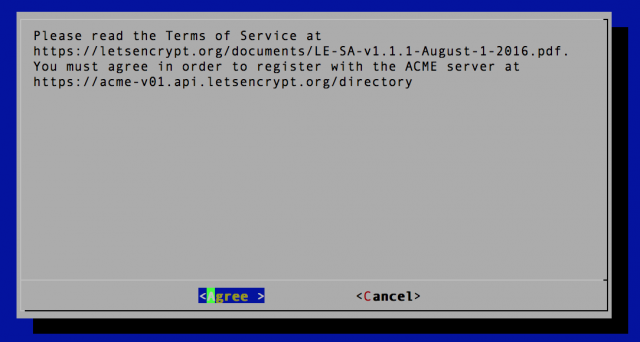
同意する。
うまく行けば、以下のようなメッセージが表示される。
IMPORTANT NOTES:
 - Congratulations! Your certificate and chain have been saved at
 /etc/letsencrypt/live/yomidon.okinawa/fullchain.pem. Your cert will
 expire on 2017-07-20. To obtain a new version of the certificate in
 the future, simply run Let's Encrypt again.
 - If you like Let's Encrypt, please consider supporting our work by:

Donating to ISRG / Let's Encrypt: https://letsencrypt.org/donate
 Donating to EFF: https://eff.org/donate-le
証明書を確認する。
$ sudo ls -al /etc/letsencrypt/live/yomidon.okinawa/
5.5 Generate Strong Diffie-Hellman Group
$ sudo openssl dhparam -out /etc/ssl/certs/dhparam.pem 2048
5.6 Create a Configuration Snippet Pointing to the SSL Key and Certificate
$ sudo vim /etc/nginx/snippets/ssl-yomidon.okinawa.conf
以下の内容を記述して保存。
ssl_certificate /etc/letsencrypt/live/yomidon.okinawa/fullchain.pem;
ssl_certificate_key /etc/letsencrypt/live/yomidon.okinawa/privkey.pem;
5.7 Create a Configuration Snippet with Strong Encryption Settings
$ sudo vim /etc/nginx/snippets/ssl-params.conf
以下の内容を記述して保存。
# from https://cipherli.st/
# and https://raymii.org/s/tutorials/Strong_SSL_Security_On_nginx.html

ssl_protocols TLSv1 TLSv1.1 TLSv1.2;
ssl_prefer_server_ciphers on;
ssl_ciphers "EECDH+AESGCM:EDH+AESGCM:AES256+EECDH:AES256+EDH";
ssl_ecdh_curve secp384r1;
ssl_session_cache shared:SSL:10m;
ssl_session_tickets off;
ssl_stapling on;
ssl_stapling_verify on;
resolver 8.8.8.8 8.8.4.4 valid=300s;
resolver_timeout 5s;
# Disable preloading HSTS for now. You can use the commented out header line that includes
# the "preload" directive if you understand the implications.
#add_header Strict-Transport-Security "max-age=63072000; includeSubdomains; preload";
add_header Strict-Transport-Security "max-age=63072000; includeSubdomains";
add_header X-Frame-Options DENY;
add_header X-Content-Type-Options nosniff;

ssl_dhparam /etc/ssl/certs/dhparam.pem;
5.8 Adjust the Nginx Configuration to Use SSL
$ sudo cp /etc/nginx/sites-available/default /etc/nginx/sites-available/default.bak
$ sudo rm /etc/nginx/sites-enabled/default
$ sudo vim /etc/nginx/sites-available/mastodon_nginx.conf
参考) documentation/Production-guide.md at master · tootsuite/documentation
$ sudo ln -s /etc/nginx/sites-available/mastodon_nginx.conf /etc/nginx/sites-enabled/
5.9 nginx再起動
$ sudo nginx -t
$ sudo systemctl restart nginx
ここまでの手順で、https://yomidon.okinawa にアクセスできるようになりました。
6. Mastodonの設定
6.1 ユーザー登録する
6.2 管理者権限をつける
$ docker-compose run --rm web rails mastodon:make_admin USERNAME={ユーザー名}
https://*****/admin/settings にアクセスして、必要な内容を設定する。
7. その他
7.1 cron設定が必要な処理
この処理は設定しておいたほうが良いそうです。
documentation/Production-guide.md at master · tootsuite/documentation #cronjobs
$ sudo crontab -e
0 0 * * * cd /home/yomiton/mastodon && docker-compose run --rm web rake mastodon:daily >>/var/log/cron.log
7.2 docker-compose の操作
停止してコンテナ削除
$ docker-compose down
Mastodonイメージ作成
$ docker-compose build
DBやアセット再設定
$ docker-compose run --rm web rails db:migrate
$ docker-compose run --rm web rails assets:precompile
起動
$ docker-compose up -d
$ sudo systemctl restart nginx
コンテナ一覧
$ docker-compose ps
7.3 nginxのログ
うまくいかなかったらまずここを見よう。
$ sudo tail -100f /var/log/nginx/error.log
$ sudo tail -100f /var/log/nginx/access.log
7.4 その他
諸々環境ごとに必要な設定を行って完了!
コメントを残す